 ( 250 ) 1-Feb-2016
I used this very nice plane that was gifted to me by my dear friend Gary C. to trim down the under bridge saddle that guides the sympathetic strings below the top.
( 250 ) 1-Feb-2016
I used this very nice plane that was gifted to me by my dear friend Gary C. to trim down the under bridge saddle that guides the sympathetic strings below the top.
 ( 251 ) 1-Feb-2016
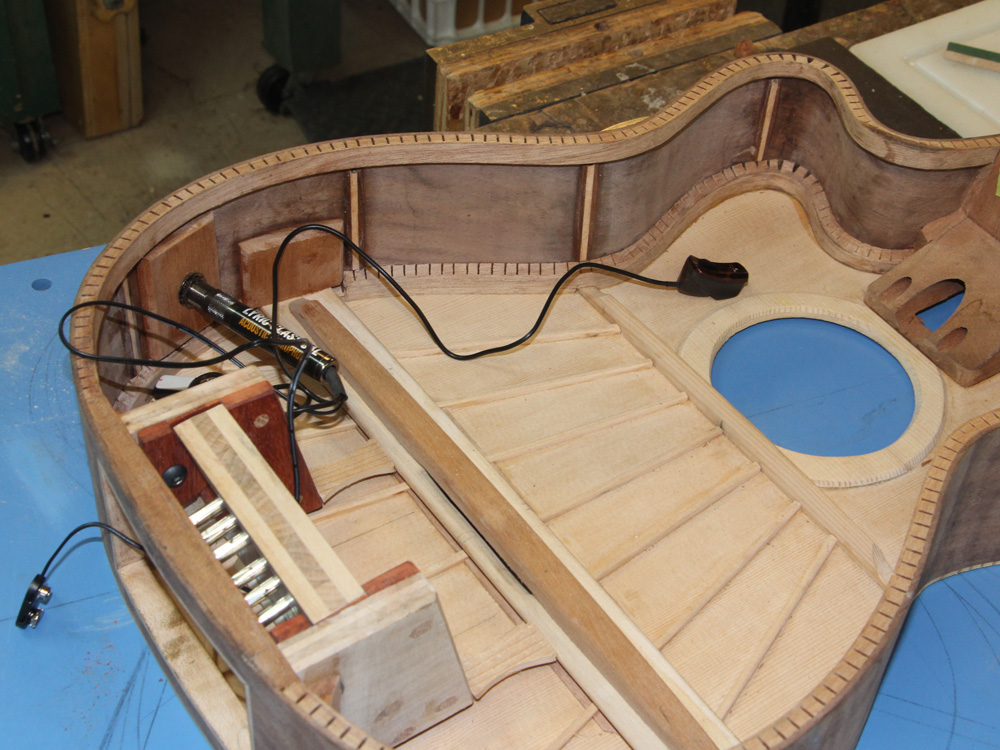
This guitar will have a pickup installed. Here I am drilling the hole for the 1/4 inch phono jack.
 ( 252 ) 1-Feb-2016
And here I am testing the placement of the electronics.
 ( 253 ) 1-Feb-2016
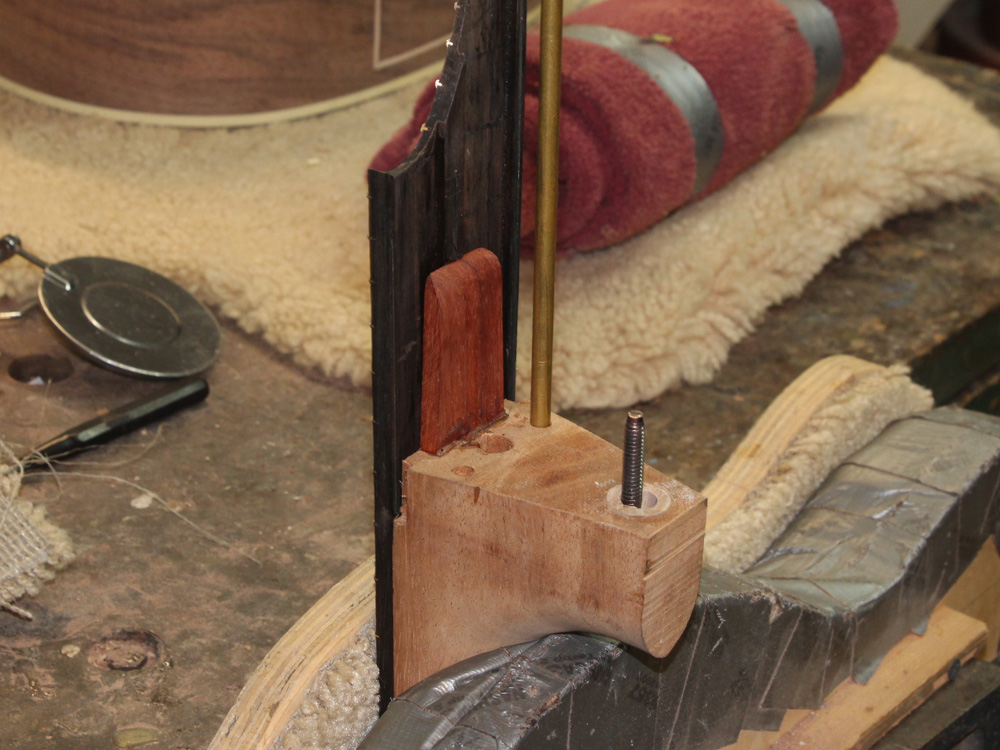
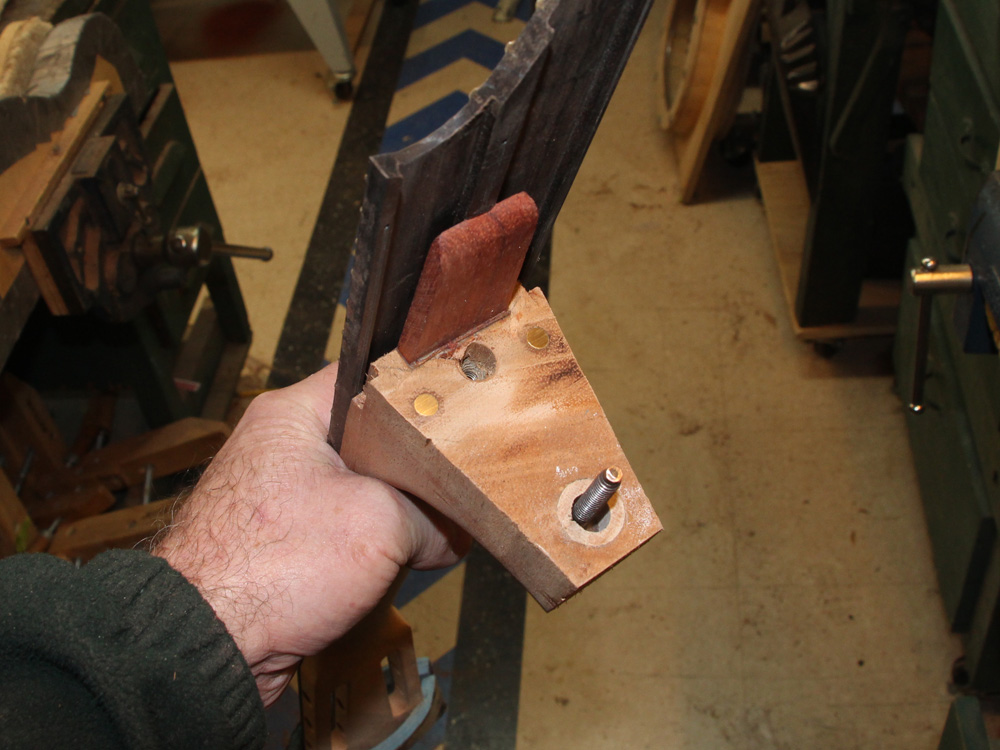
The sympathetic string tuning bracket will have a considerable torque applied to it. I have installed a bridge between the bracket and the internal cross bar to help ensure it doesn't rotate under the tension of its strings.
 ( 254 ) 1-Feb-2016
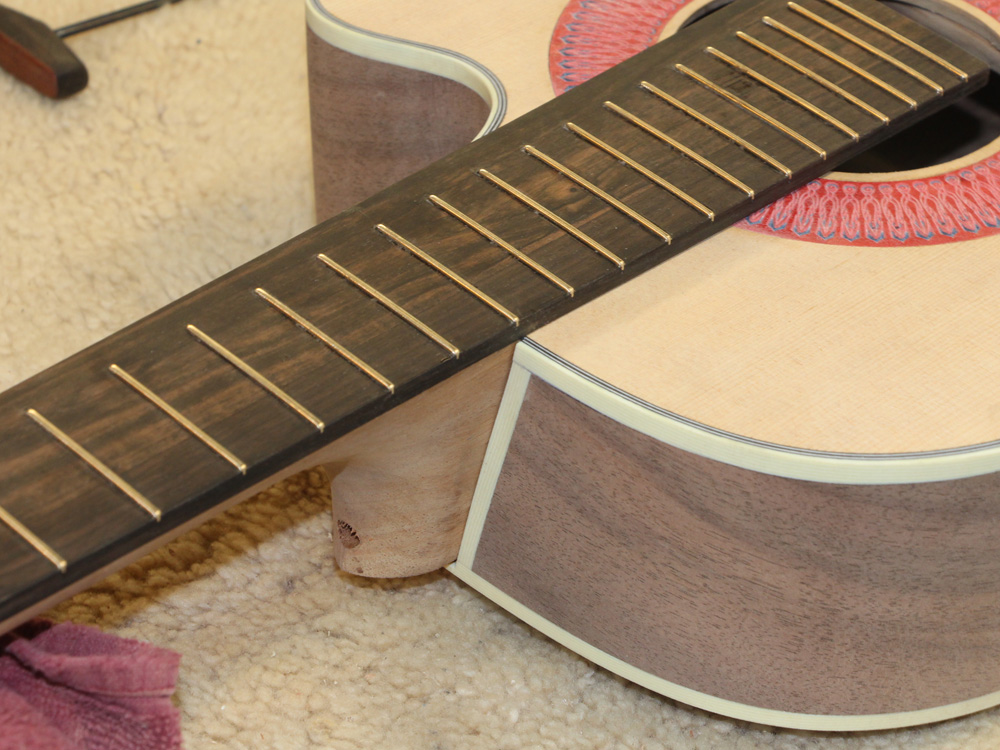
To ensure the fretboard remains stable I have installed several ebony cross bars to tie it together.
 ( 255 ) 1-Feb-2016
And to improve the stability of the cantilevered section I am installing carbon fiber reinforcements.
 ( 256 ) 1-Feb-2016
 ( 257 ) 1-Feb-2016
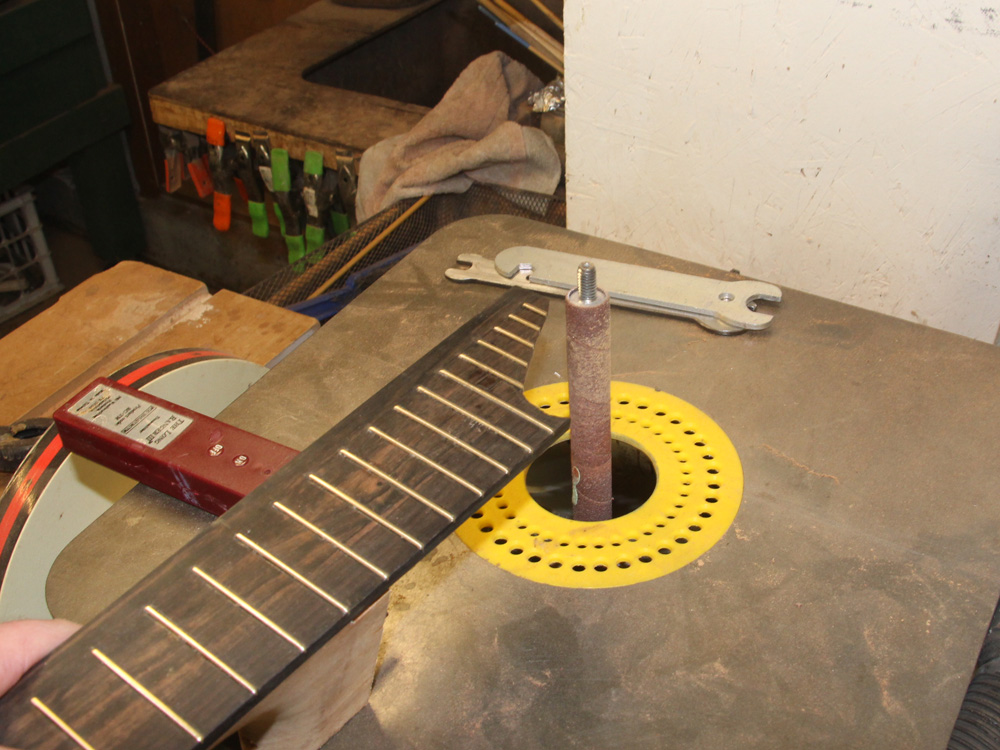
Now I use the belt sander to trim the fretboard to size.
 ( 258 ) 1-Feb-2016
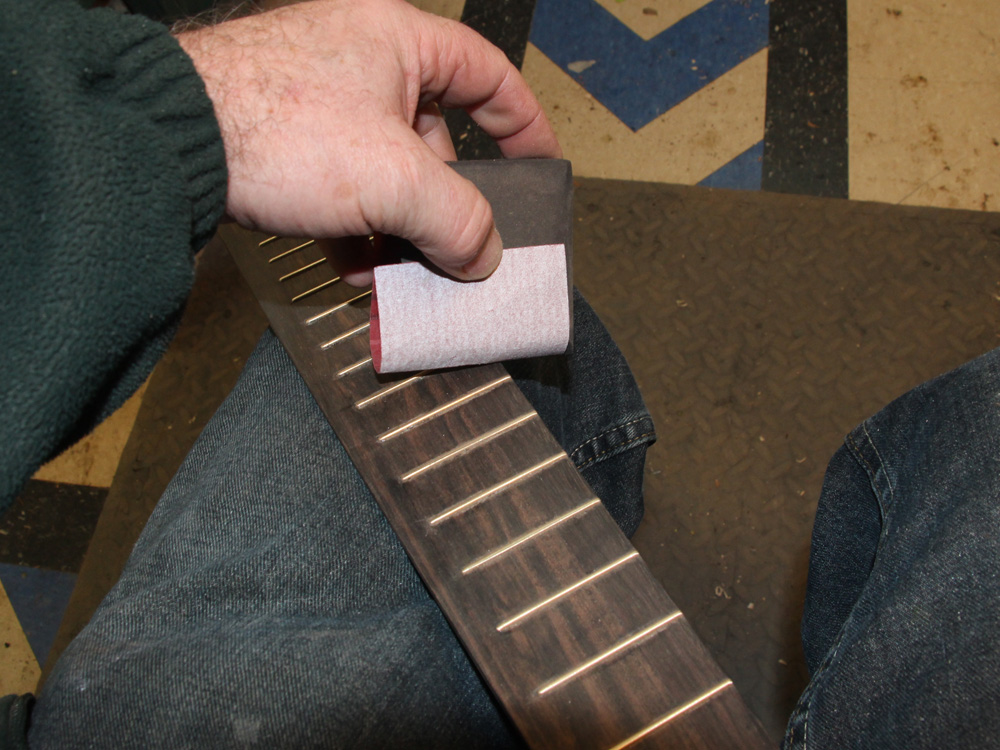
And then a bit if hand work to dress the ends of the fretwire.
 ( 259 ) 1-Feb-2016
I strive to create hemispherical ends on the fretwire.
 ( 260 ) 1-Feb-2016
I next align the fretboard on the neck blank.
 ( 261 ) 1-Feb-2016
And then glue it in place with epoxy.
 ( 262 ) 1-Feb-2016
I use lots of clamps to get even pressure.
 ( 263 ) 1-Feb-2016
After the fretboard is set I trim off the excess of the neck blank.
 ( 264 ) 1-Feb-2016
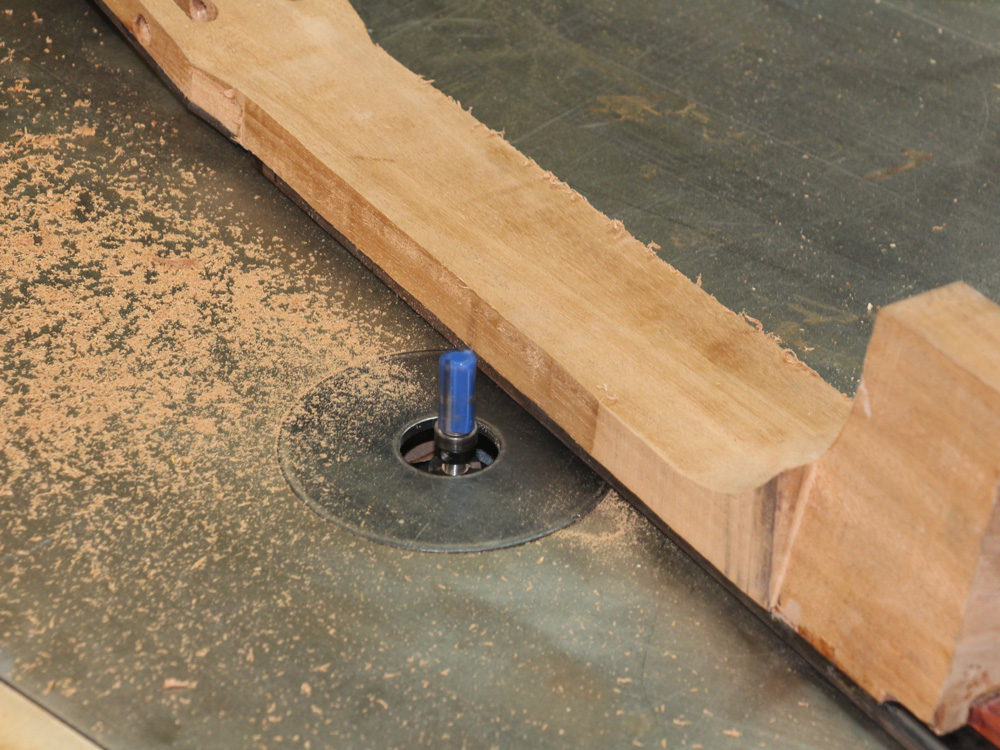
And then use the router to bring the edges flush with the fretboard.
 ( 265 ) 1-Feb-2016
My customer Ben C. giving it a test drive.
 ( 266 ) 1-Feb-2016
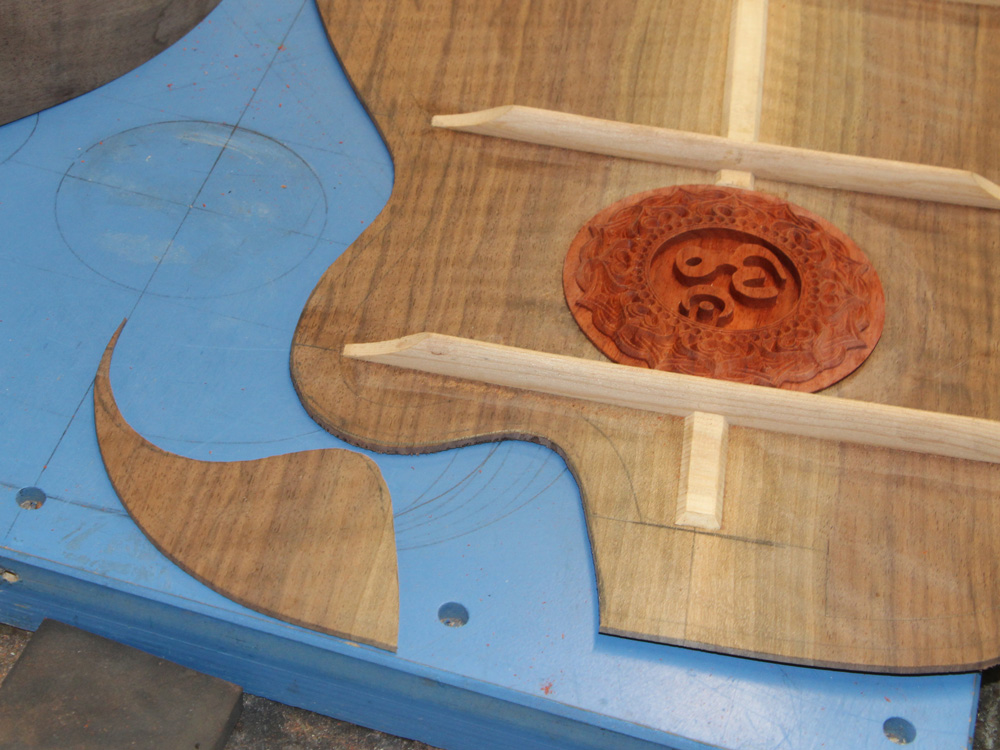
Before I glue the back on to the rim I used the CNC tool to create the contra-rosette. Here I am sanding the back to of the contra-rosette to match the shape of the back.
 ( 267 ) 1-Feb-2016
A bit of old (thanks gram pa) railroad tie holds the contra-rosette in place as it is glue onto the back.
 ( 268 ) 1-Feb-2016
And then I trimmed away the cutaway section.
 ( 269 ) 1-Feb-2016
 ( 270 ) 1-Feb-2016
Before gluing the back on I installed the label.
 ( 271 ) 1-Feb-2016
First I position the back on the rim.
 ( 272 ) 1-Feb-2016
I then make sure I have clear access to the side form.
 ( 273 ) 1-Feb-2016
After spreading a thin layer of glue on the edge of the rim I place the back and the flange in place and tighten it down.
 ( 274 ) 1-Feb-2016
When the glue is set I remove the flange.
 ( 275 ) 1-Feb-2016
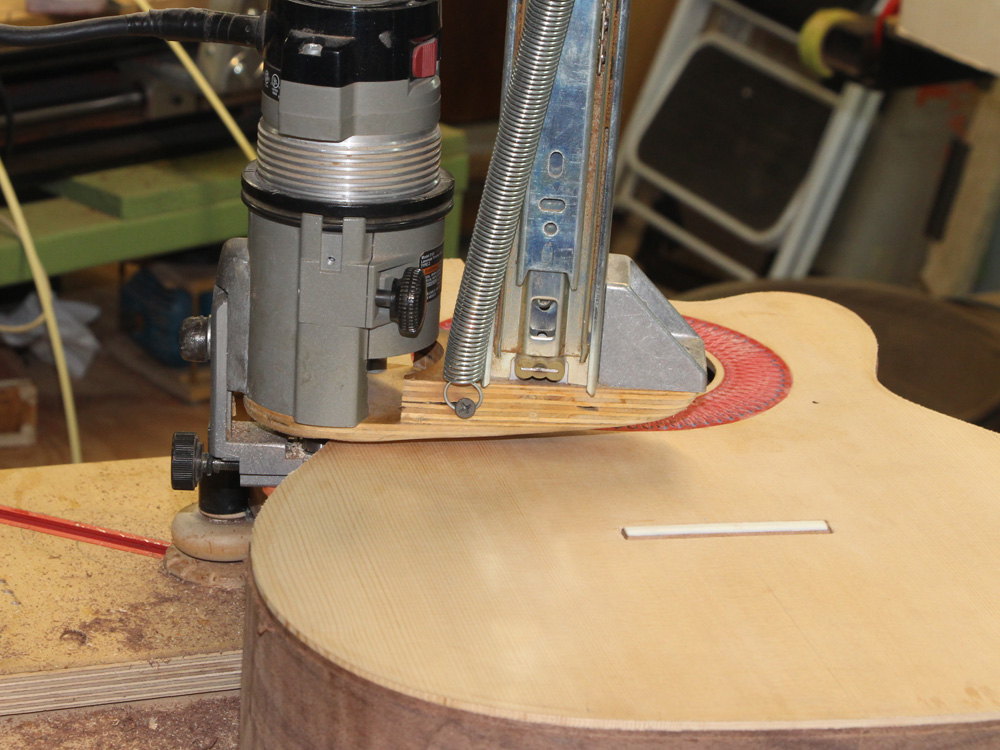
And then I use an edge router to trim off the excess.
 ( 276 ) 1-Feb-2016
Now, on to shaping the neck.
 ( 277 ) 1-Feb-2016
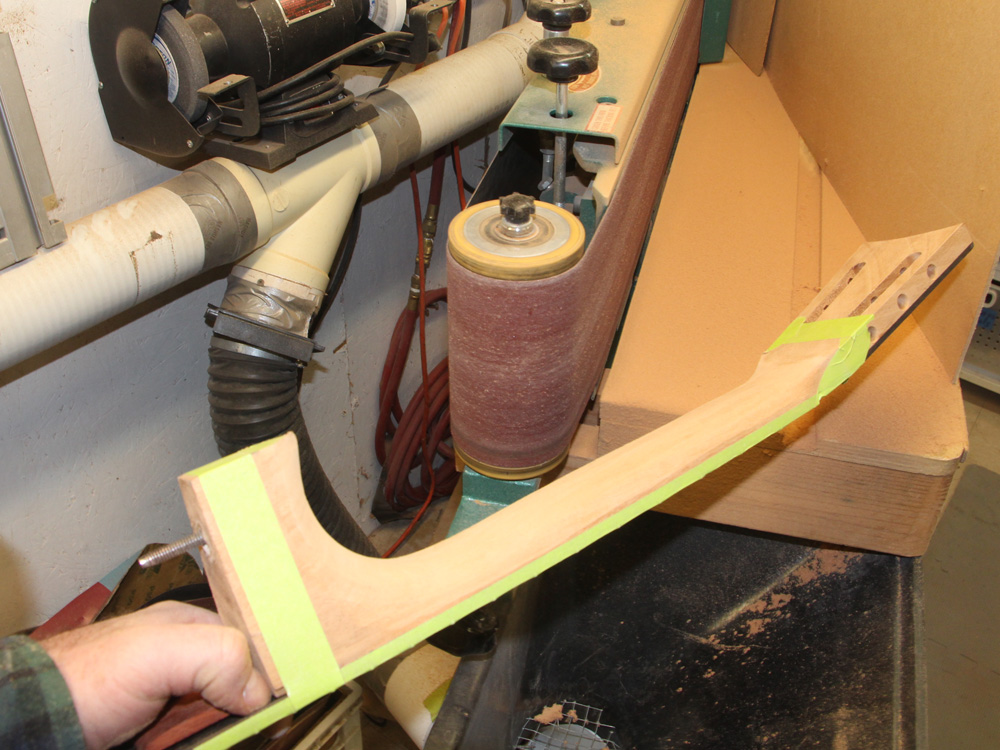
I use the belt sander to get to the rough shape.
 ( 278 ) 1-Feb-2016
And then I follow up with hand tools to finish the job.
 ( 279 ) 1-Feb-2016
After the neck is shaped I use my Universal Bindalator to create the channels for the binding. The bindalator holds the router parallel to the sides as I route the channels.
 ( 280 ) 1-Feb-2016
 ( 281 ) 1-Feb-2016
I start installing the binding at the frame around the heel of the neck.
 ( 282 ) 1-Feb-2016
And then I progress to the back.
 ( 283 ) 1-Feb-2016
And then then the top.
 ( 284 ) 1-Feb-2016
I decided to use magnets to hold the access plate in place.
 ( 285 ) 1-Feb-2016
I used playing cards to center the plate while the glue that holds the magnets in place dries.
 ( 286 ) 1-Feb-2016
Once all of the binding and purfling is in place I level everything with power and hand tools.
 ( 287 ) 1-Feb-2016
The neck installed.
 ( 288 ) 1-Feb-2016
 ( 289 ) 1-Feb-2016
Now, after careful measurements I trim the extended fretboard to shape.
 ( 290 ) 1-Feb-2016
I install brass plugs in the heel of the neck were the set screws will make contact.
 ( 291 ) 1-Feb-2016
 ( 292 ) 1-Feb-2016
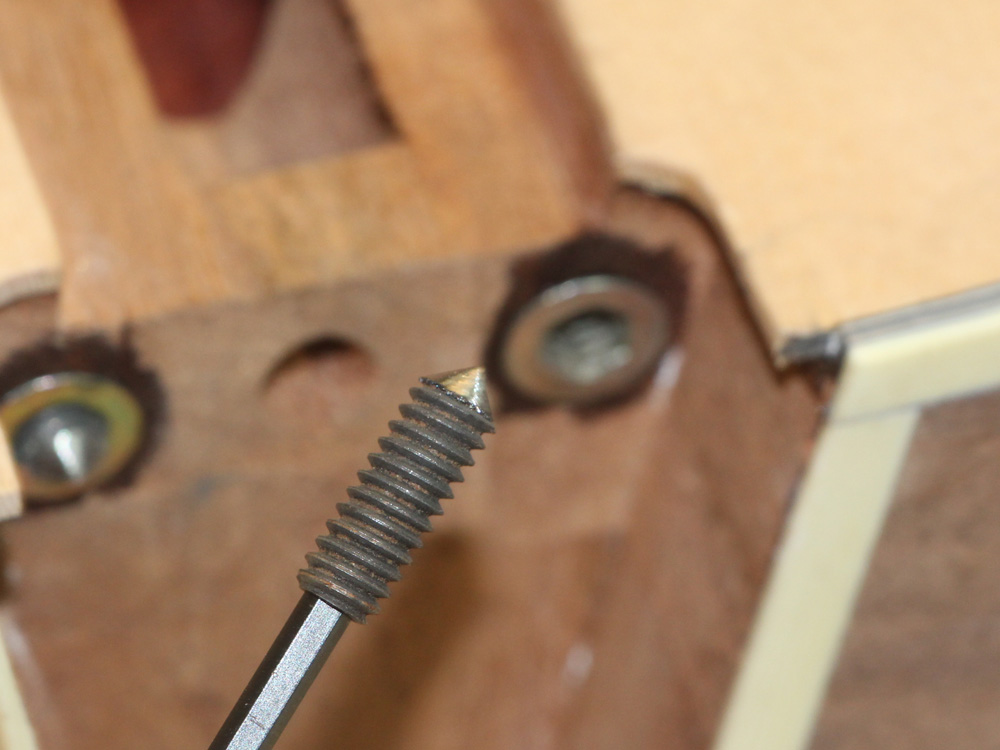
And I bring the setscrews to a point so they will bite into the brass plugs and provide a definitive point of contact.
 ( 293 ) 1-Feb-2016
To prevent the neck angle retaining ferule from moving over time I install two pins to hold it in place.
 ( 294 ) 1-Feb-2016
 ( 295 ) 1-Feb-2016
 ( 296 ) 1-Feb-2016
Side dots.
 ( 297 ) 1-Feb-2016
And now I install the neck and tighten down the neck bolt.
 ( 298 ) 1-Feb-2016
The battery for the electronics will be housed in the access plate. Here I am routing out a hole to hold the battery
 ( 299 ) 1-Feb-2016
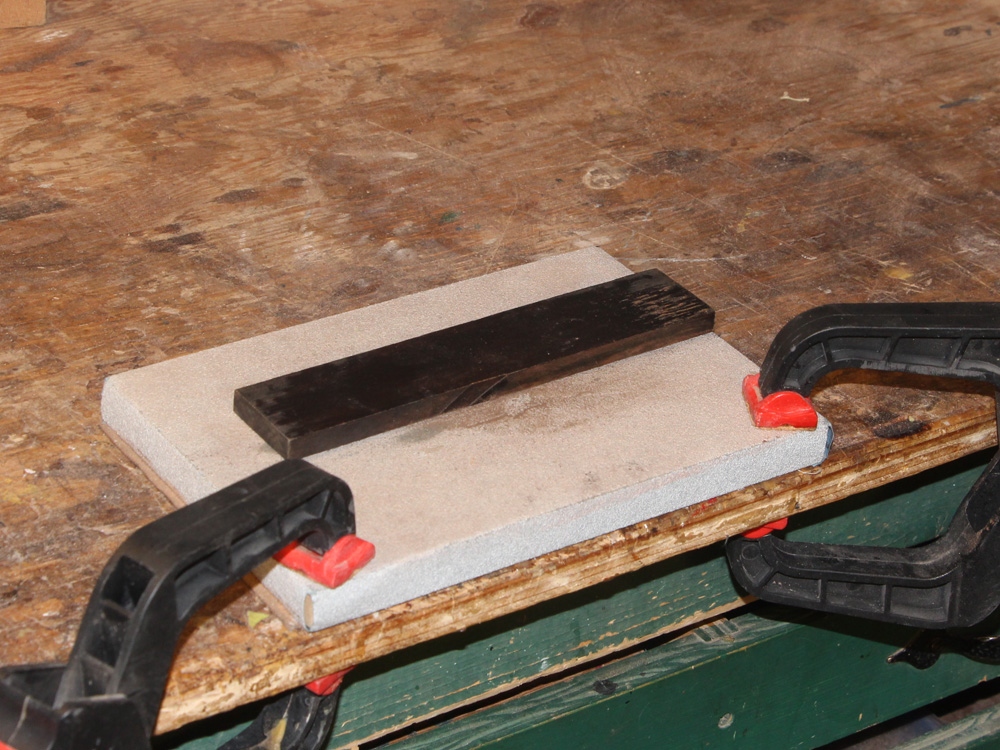
Next I turn my attention to the bridge. I start by sanding the bottom of the bridge blank so it conforms to the shape of the top.
 ( 300 ) 1-Feb-2016
And then I use the oscillating sander to create the wings.
 ( 301 ) 1-Feb-2016
Before I start the finish work I install my signature rose in the head stock.
 ( 302 ) 1-Feb-2016
 ( 303 ) 1-Feb-2016
And then I can start the finishing process. I use a thin epoxy to fill the pores in the wood. This takes several coats and sanding steps. When I am finished and happy all of the surfaces will be "perfectly" smooth and have a thin coat of epoxy. The closer to perfection I am at this stage the easier and faster the final coats of nitrocellulose will go on. I have come to conclude it is a fools errand to depend on the nitrocellulose to correct any defects; so I spend a lot of time with the epoxy coats to fill all of the pores and gaps.
 ( 304 ) 1-Feb-2016
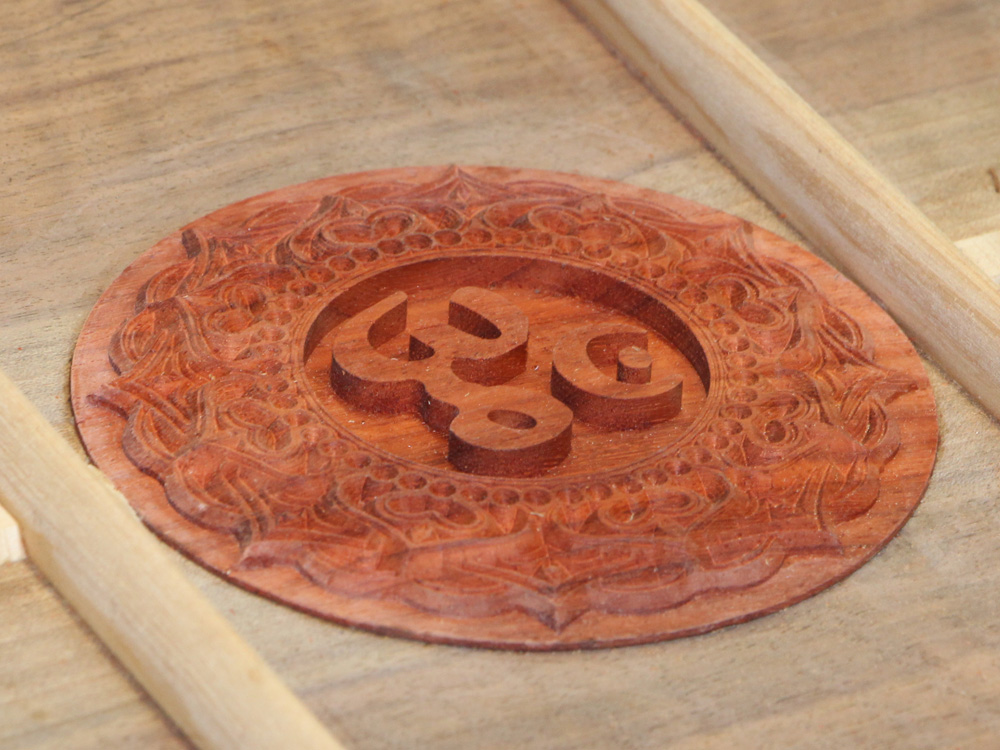
After some consideration we decided to install an "Aum symbol" on the access plate. I use the CNC tool to create the inlay and its channel.
 ( 305 ) 1-Feb-2016
The inlay was created in mirror reverse and then dropped into the channel. I used this process because the inlay has several independent elements and the round plate holds them in place until they are glued in.
 ( 306 ) 1-Feb-2016
After the inlay is glued in place I sand everything flush.
 ( 307 ) 1-Feb-2016
Provided by Ben C.
The symbol Aum or Om is first seen written in the Rig Veda which dates to 1500 BC-ish. However, we don't know when the knowledge behind Aum was first understood because, like many civilizations, knowledge was passed down orally through generations. The knowledge of Aum likely goes back much, much further.
Aum is a deeply important symbol in Hinduism, Jainism and Buddhism. The meaning of the symbol differs some across the various traditions. However, the oldest Vedic texts point to the Om symbol as representing a well of deeply profound spiritual wisdom. I'll break down the symbol itself and what the different elements represent. Then I'll try to explain how that relates to all of creation (:
Indian knowledge understands man to exist within three states of being - Waking, Dreaming, and Deep Sleep. The Aum symbol, which looks like this ॐ, also directly correlates to these three states. There are three curves that are connected and form what look like the number 3 with a tail. The bottom curve of the '3' is the largest and represents the waking state. The top curve is the deep sleep state. And the tail is the dreaming state. In the waking state we are aware of ourselves within the physical universe which is bound by the laws of cause and effect. The dreaming state is that of our sub-conscious, within the realm of dreams, and which is not bound by physical laws, but still feels very real. The deep sleep state is when we are closest to our true nature. Yet, we are unable to be conscious of ourselves during deep sleep because we arrive there through the avenue of sleep. So, essentially we all reach enlightenment every night, but don't realize it consciously. Some very rare beings can remain conscious through the three levels.
The curved line that looks like a bowl and is separate from the 'tailed 3' represents Maya. Maya is essentially all the realms of name and form that are under the laws of cause and effect, are constantly changing, and are impermanent. Maya is what most of us take to be real, since it exists. But, it is under the laws of karma and therefore impermanent, and fundamentally cannot be real. Maya is the illusion.
The dot above the bowl represents Turiya, or the fourth state. You could say this is the equivalent of Nirvana, Samadhi, Enlightenment, etc. It is our true nature beyond the states of waking, dreaming, deep sleep, and untouched by Maya. It is the soul that is beyond the realms of name and form, unchanging and never ceasing to exist, nor having not existed.
All creation comes from the unmanifested state of Turiya, via a causeless cause, to create all the realms of name and form, that are essentially unreal, for they all eventually end up back into the unmanifested state. Just as we inhale, hold, then exhale... the process goes on and on like that. Unmanifested, manifesting, sustaining, dissolving, unmanifested. And, beyond all that, is the bliss and peace or pure existence of which is our true nature. When I say our, I mean all consciousness.
The simplest metaphor for Om is the bell. Sound is inherent within the bell, but the bell itself does not produce sound. There is only stillness, existence, and infinite potential for sound to be produced. In order for sound to manifest there needs to be some cause or desire for that to occur. But within Aum, therein lies both the cause and the effect in one. Hence, there is the moment when a causeless cause triggers all manifestation to ring out like a bell. Seemingly endless vibrations creating all the worlds. Only to end back into the very bell that produced the sound. It's beautiful (: